Tutorial 01: Step by step to your first NC program
Learn the basic workflow of send2cnc by creating a simple engraving.
The example project shown can be easily opened through the start interface (section Examples) of send2cnc.
 © send2cnc.com
 © send2cnc.com
A New Project
Start send2cnc and create a new, empty workspace by clicking on File New.
 © send2cnc.com
On the left side of the program interface, you'll find the project tree. We will go through it step by step from top to bottom, which corresponds to the usual workflow.
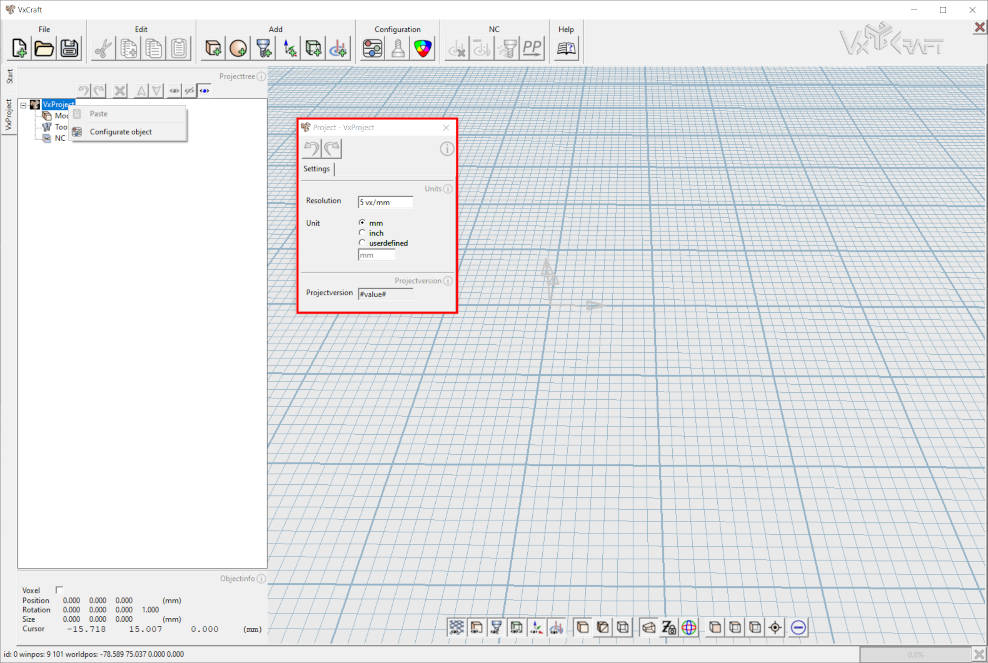
We start with the settings for the first element - the project itself. By double-clicking on the element or using the context menu, we open the settings.
 © send2cnc.com
Here, the desired resolution and the unit used are set. The work grid is adjusted accordingly. The very fine lines always show the size of a single voxel, the smallest dimension used for the calculation. Details smaller than a voxel are not considered in the calculation.
The slightly stronger lines show our resolution, which in the shown example is set to 5 s2/mm. The distance always corresponds to one unit, in our case, one millimeter. The thicker lines always have ten times the distance of our unit, i.e., 10 millimeters or one centimeter. This gives us a sense of the scale of our project.
Loading the Model from an Image
 © send2cnc.com
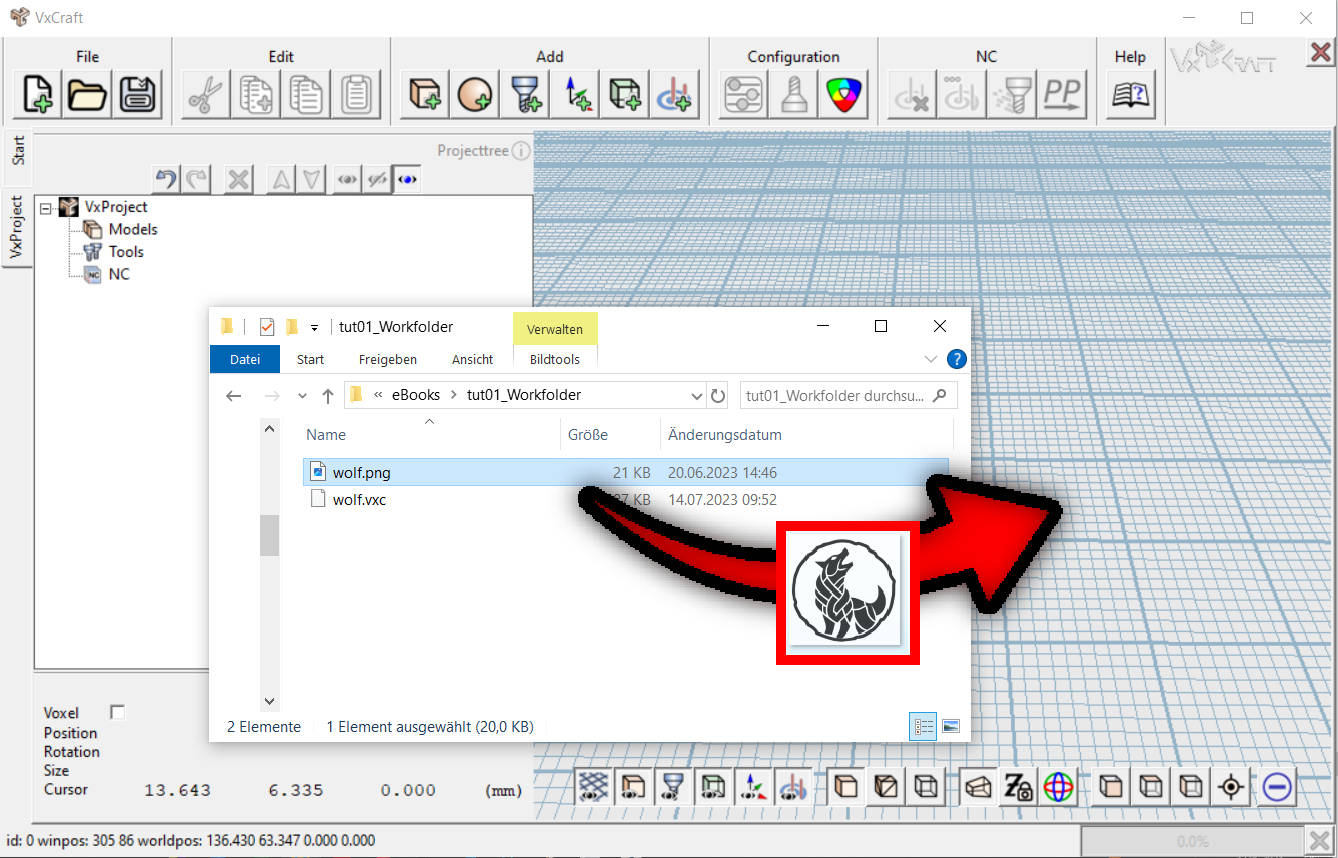
As a simple example, a black-and-white illustration of a logo will now be loaded. There are two ways to do this.
A.) The image file can be easily dragged and dropped into the empty project:
 © send2cnc.com
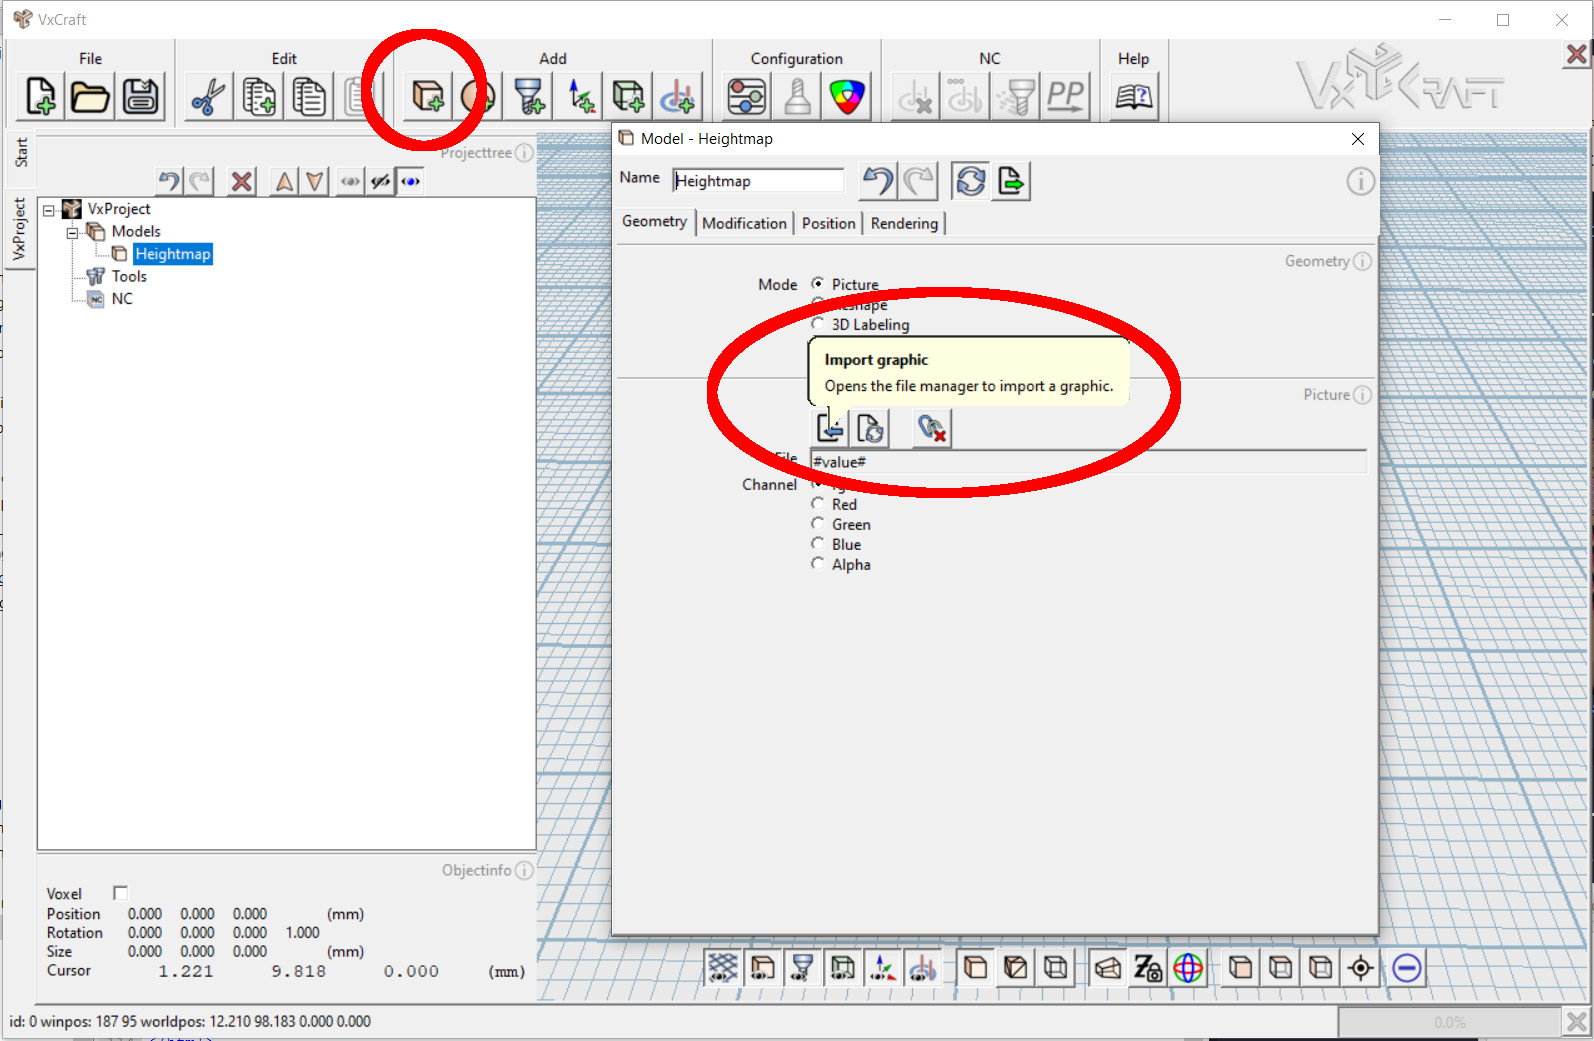
B.) Alternatively, a new heightmap model can be created first, and an image can be loaded via its geometry settings:
 © send2cnc.com
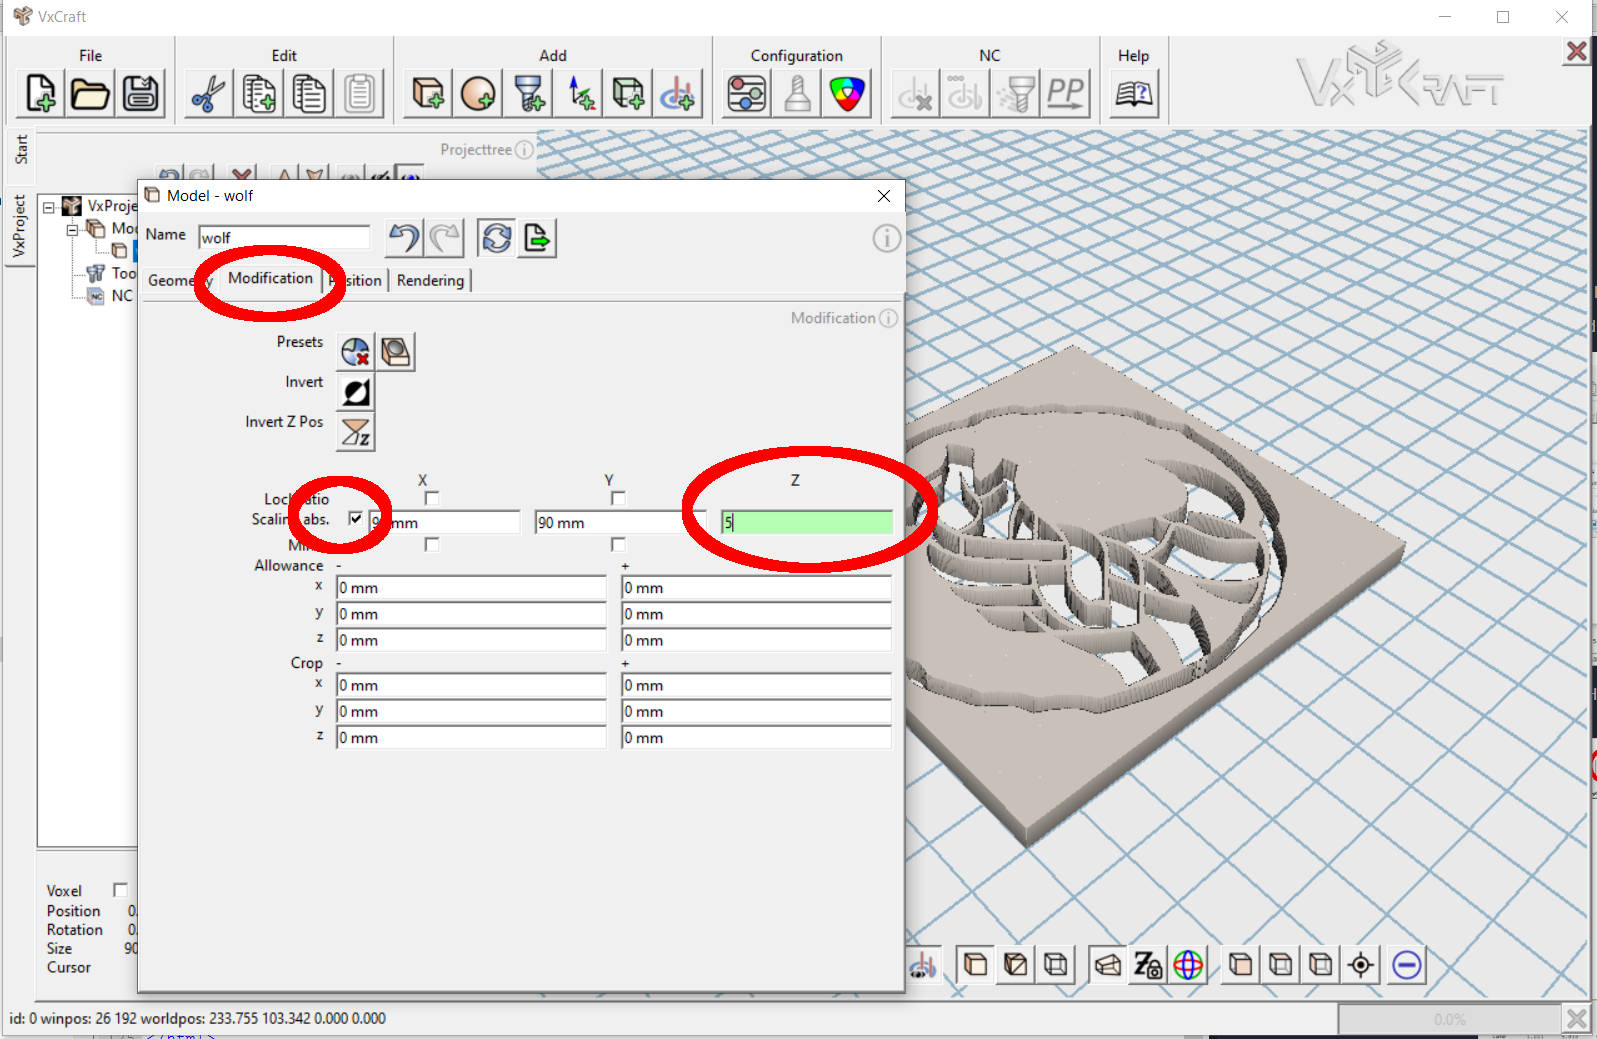
Scaling the Model
In the Modification tab of the model settings, the model can be scaled, cropped, mirrored, and inverted. In our example, we simply scale our model in the Z-direction to an absolute measure.
 © send2cnc.com
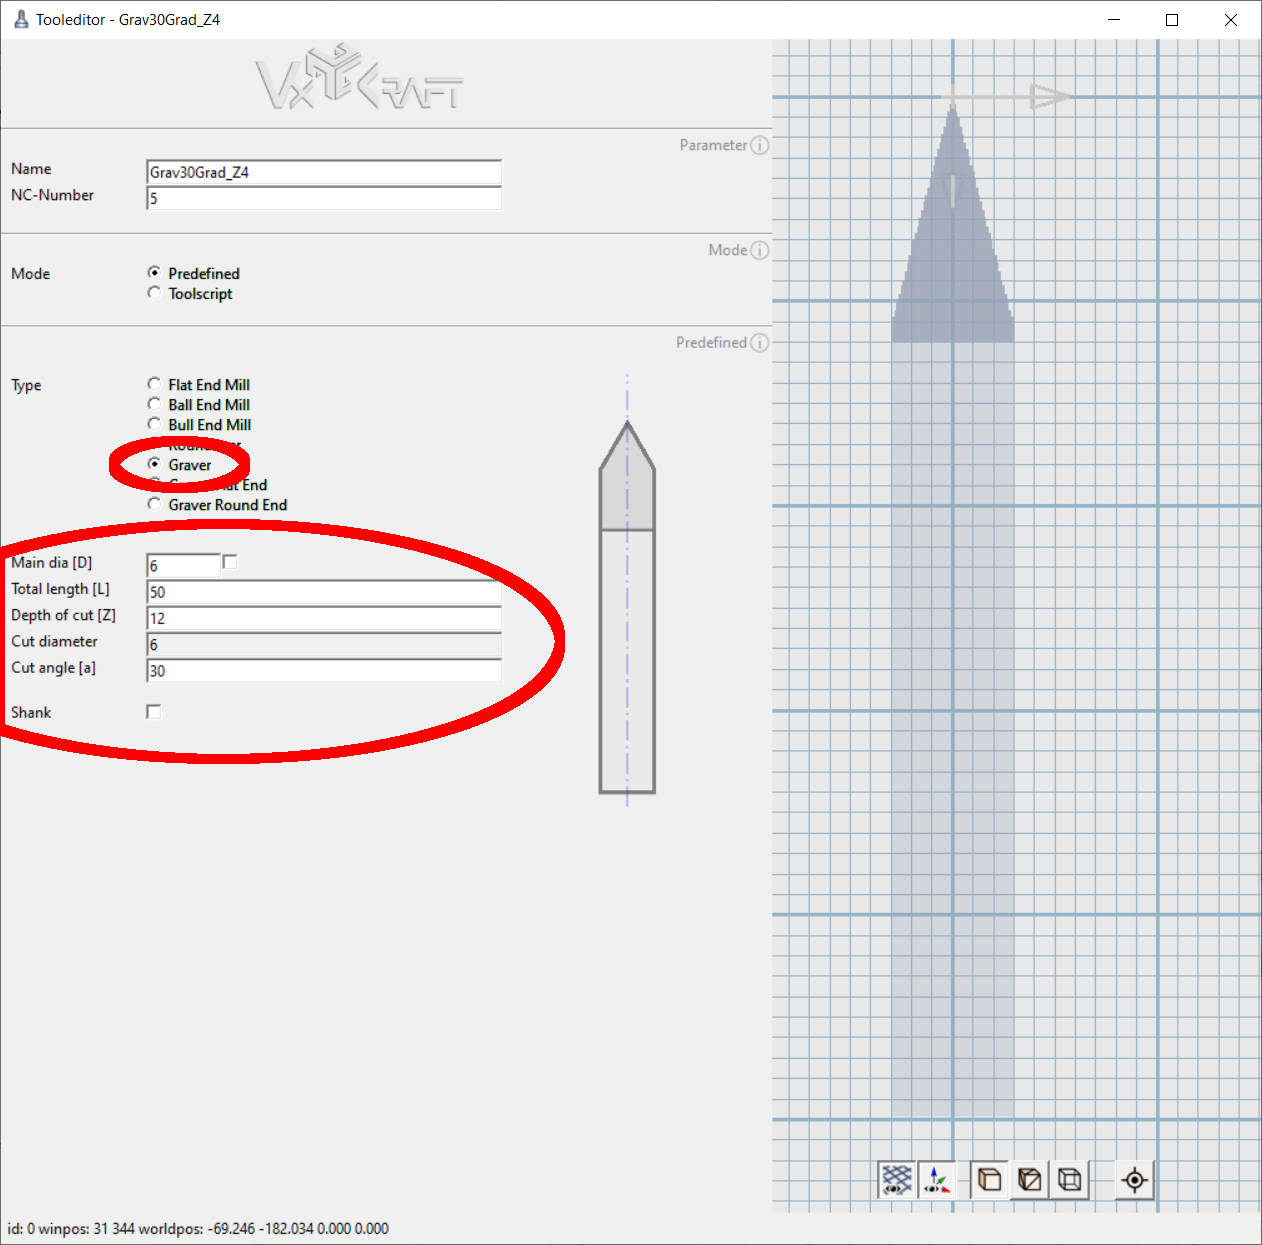
Creating a Tool
The next step is to create a new tool. A new tool can be created under the "Create" menu item.
In our example, we will not load the tool from a template but instead create a new one.
When the tool object is created, the settings dialogue and tool editor for the object are automatically opened. These dialogues can also be accessed later through the object's context menu.
 © send2cnc.com
In the tool editor, we enter the exact dimensions of our engraving mill and then close the tool editor.
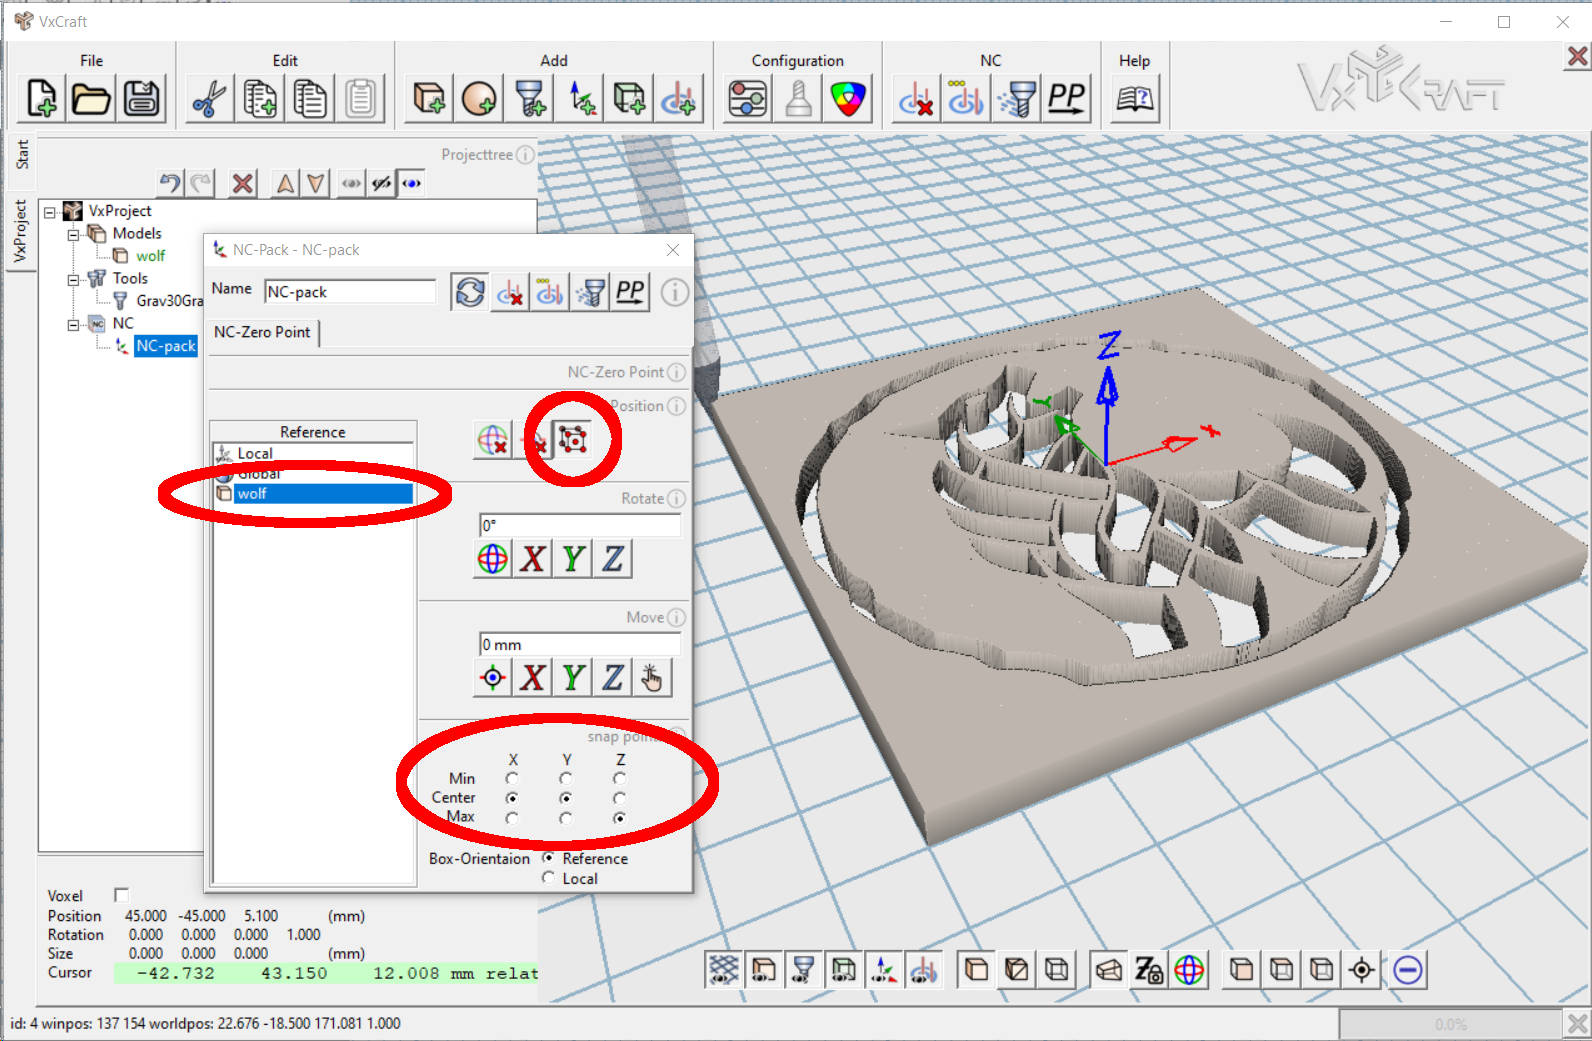
Creating an NC-Origin and Defining the NC Origin
The next object to create is an NC-Origin. An NC-Origin is a folder that contains various objects relevant for toolpath calculation and sets the CNC origin for the included jobs. Each job in the NC-Origin uses this origin and the rotational alignment.
 © send2cnc.com
In our example, the NC origin is located at the top center of the logo. With the settings shown in the image, the center is calculated automatically.
Alternatively, the NC origin can be moved, rotated, reset, or set by clicking using the positioning settings.
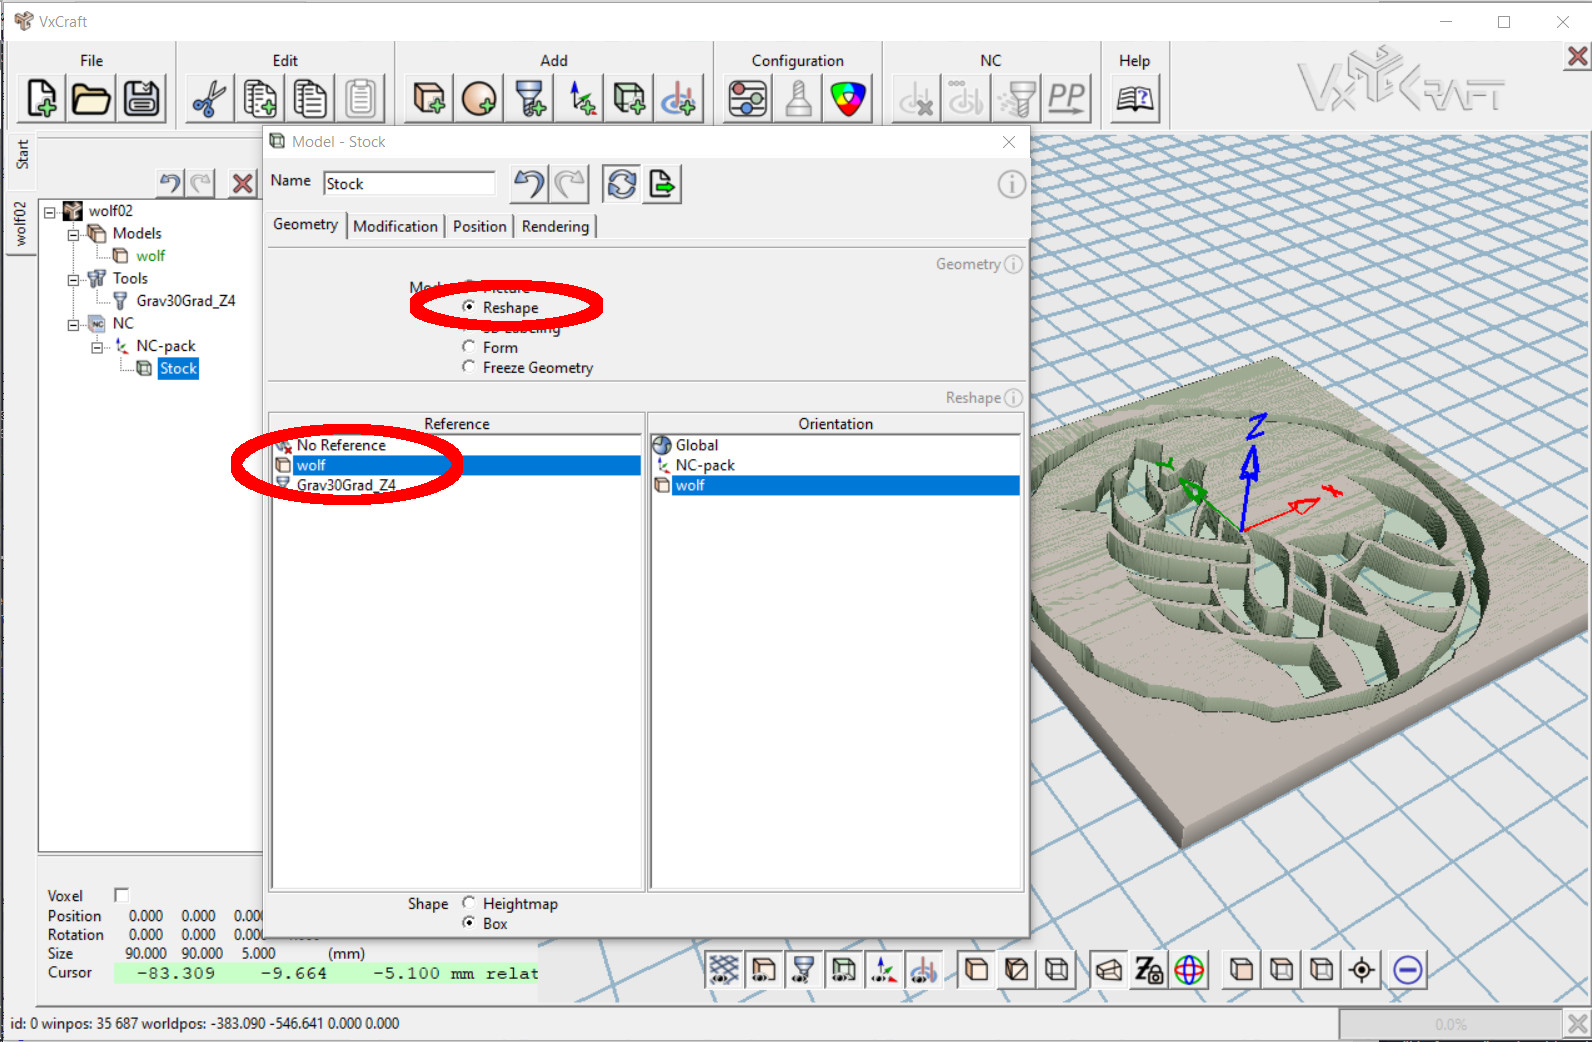
Creating a blank Piece (Optional)
To inform send2cnc about the appearance of the raw material, a blank piece can be created. This is not mandatory, but with a blank piece, send2cnc can generate toolpaths with collision checking.
As with the other objects, we create a new blank piece via the "Create" menu item. The blank piece is essentially a heightmap object, and the settings dialogue is structured identically.
 © send2cnc.com
Unlike our model, we choose a different method for generating the geometry for the blank piece. We select the "Reshape" mode and choose the wolf logo as the reference. This automatically uses the size of the reference model for the blank piece. In the 3D window, the object is displayed as green/transparent.
The First Toolpath
Now we have defined all the geometric elements needed to generate our toolpath and create a new job object that contains our milling parameters.
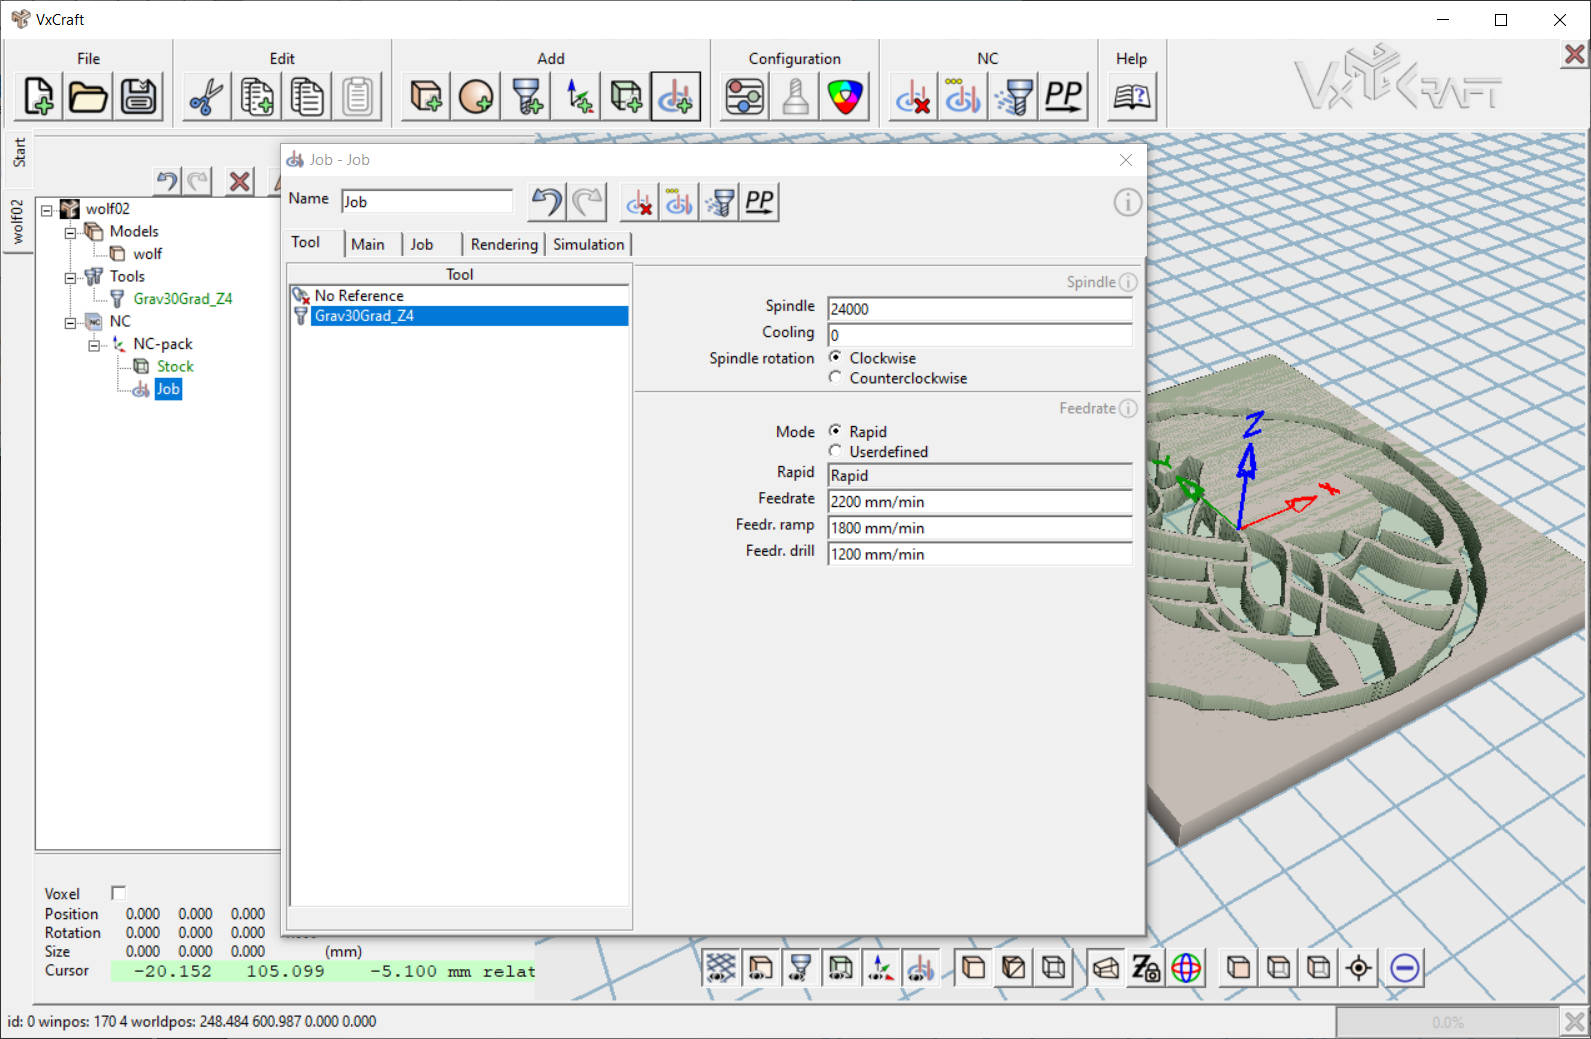
In the opened settings window for the job object, we set the created objects (model, tool, blank) as geometry references and configure all the milling parameters.
 © send2cnc.com
 © send2cnc.com
Brief Explanation of Each Geometry Reference and Parameter
- Tool
- Tool Reference: Here we select our previously created tool. The tool geometry is used for radius correction and collision checking.
- Spindle: Specifies the spindle speed.
- Feed Rate: Parameters and rapid traverse options for the milling feed.
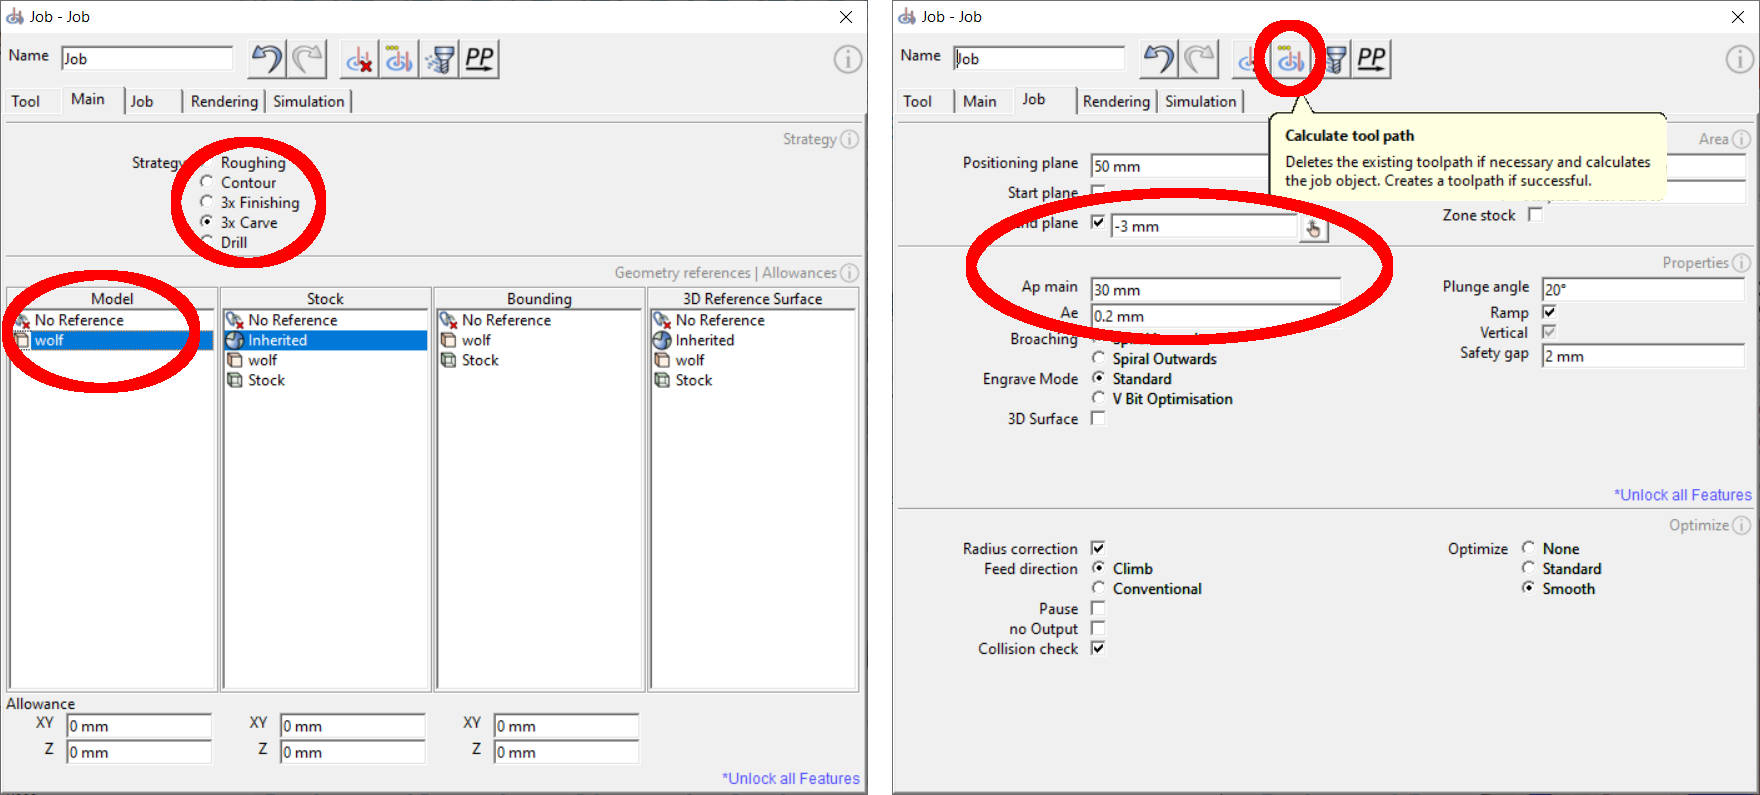
- Main
- Strategy: Selects the base algorithm for the calculation. For engravings, the 3xCarve strategy is very suitable.
- Model Reference: Here we select the previously created model (wolf logo) on which the engraving will be performed. Multiple models can also be selected.
- blank: This option can be left as "inherited." This selection uses the blank piece that is in the project hierarchy above the job. This is especially useful when multiple jobs are present, as this way the blank is inherited from one job to the next, considering the material removal of each job.
- Job
- End Plane: The depth limit is set to -3mm from the NC origin.
- Ap Main: The main depth of cut controls the vertical step-down. If this is smaller than the maximum engraving depth, intermediate levels are created at the main depth of cut distance, which are cleared before the next step-down.
- Ae: The lateral step-over is chosen to be very small at 0.2mm so that the pointed engraving cutter can also cleanly work on the bottom surface.
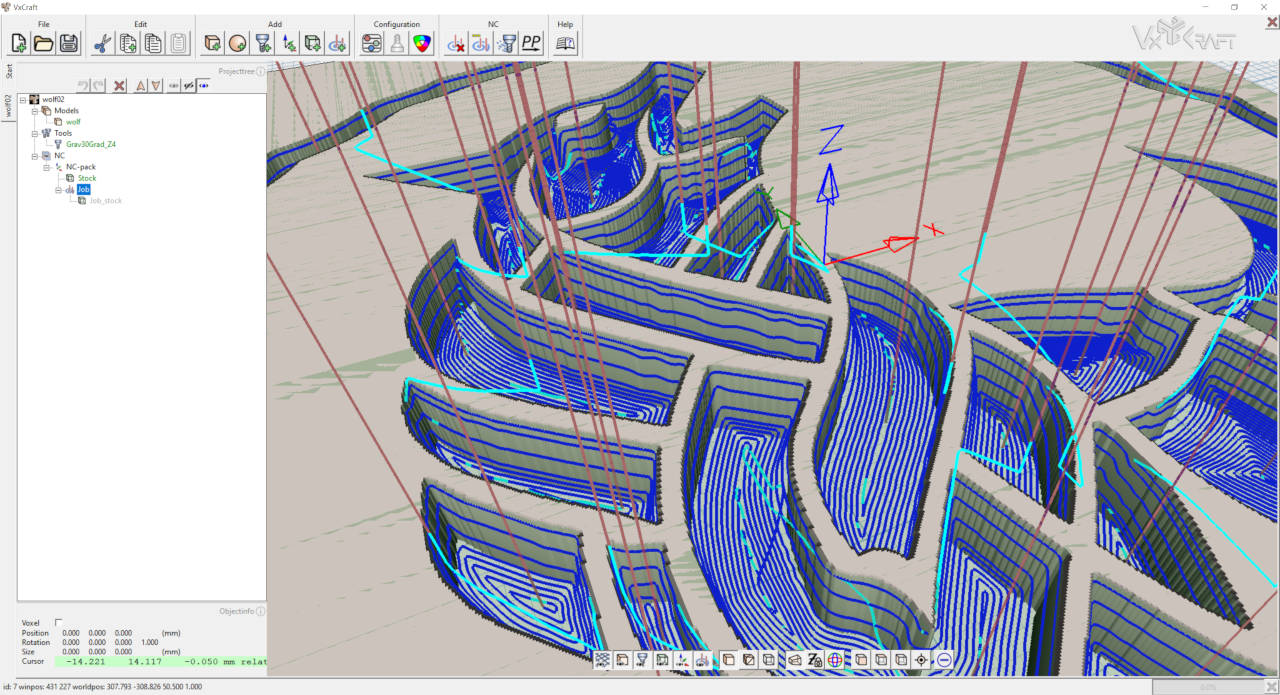
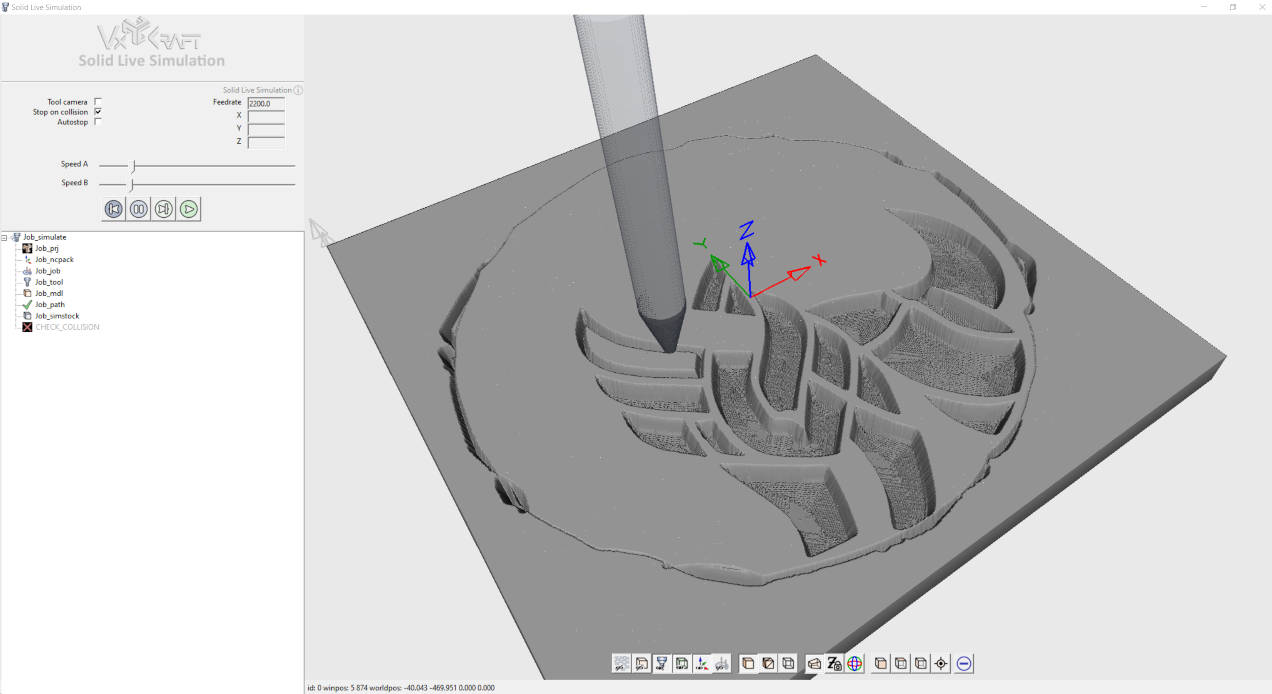
Once all the parameters are set, we can start the calculation with the "Calculate Toolpath" button. If the calculation is successful, we will see the generated toolpaths in the rendering window.
 © send2cnc.com
 © send2cnc.com
Solid Live Simulation (optional)
 © send2cnc.com
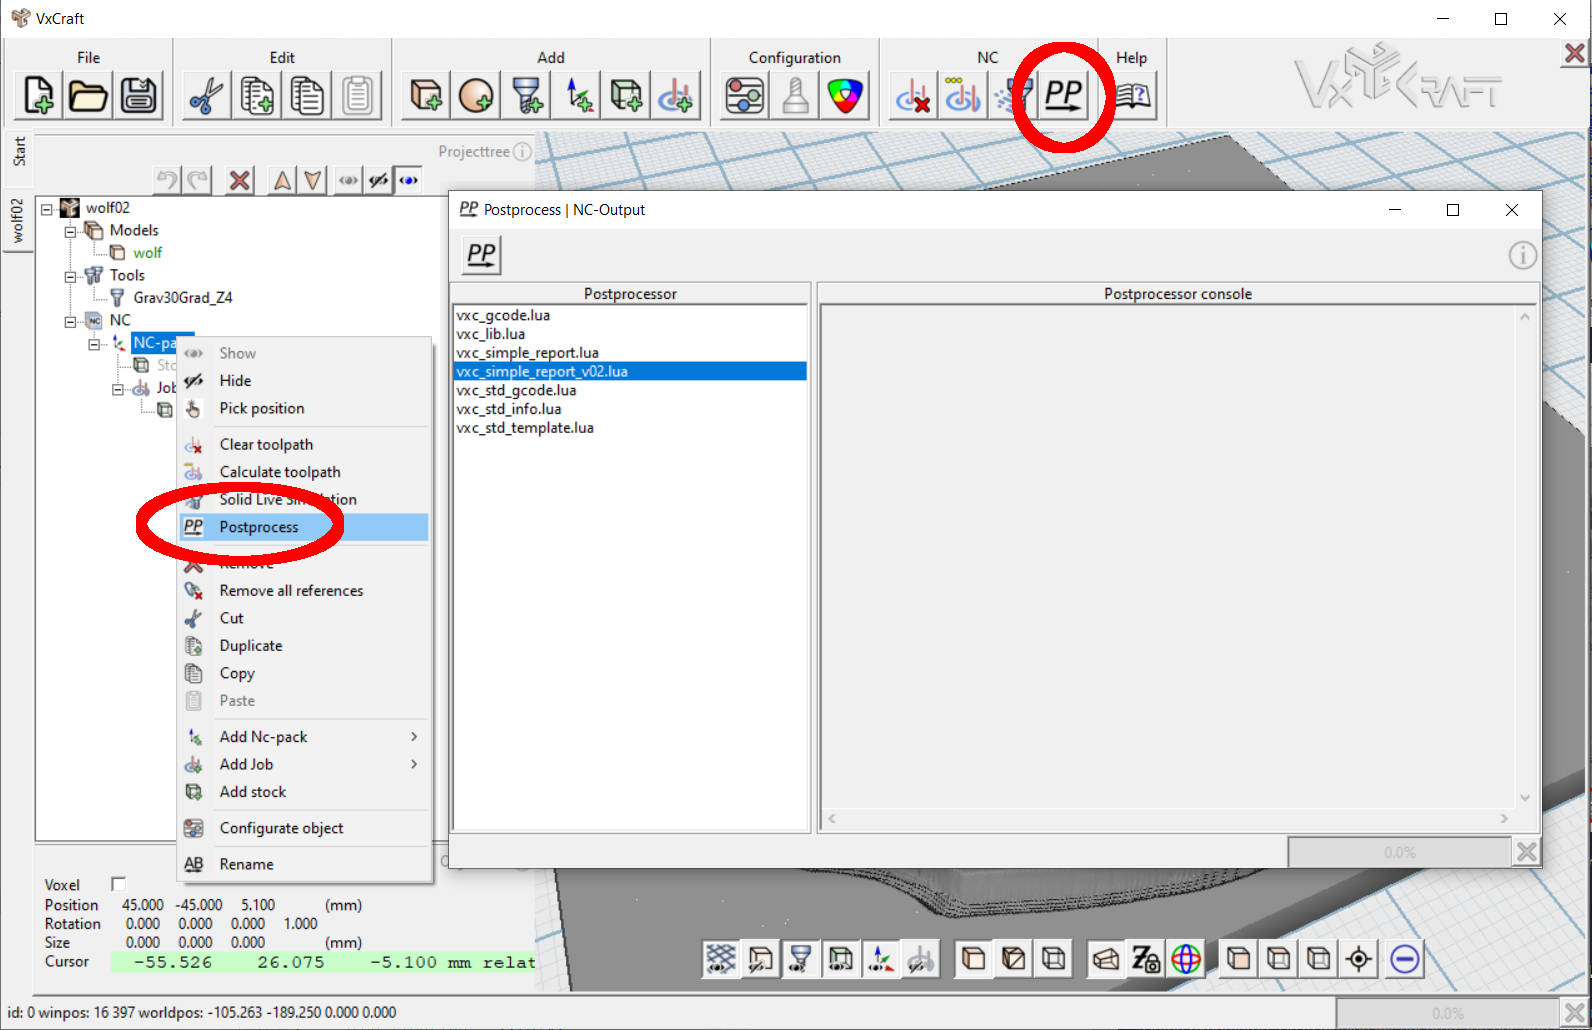
Postprocessor - Generating the Executable NC File
To make the toolpaths readable for the CNC machine, we need to export the data. To do this, we select our job and open the postprocessor environment via the context menu on the job (or NC-Origin).
 © send2cnc.com
Generate Report (Optional)
The postprocessor "s2c_simple_report" can be used to generate an printable NC report. This is very useful as it contains all relevant information for setting up the machine. It also notes the estimated machining time for each job.
 © send2cnc.com
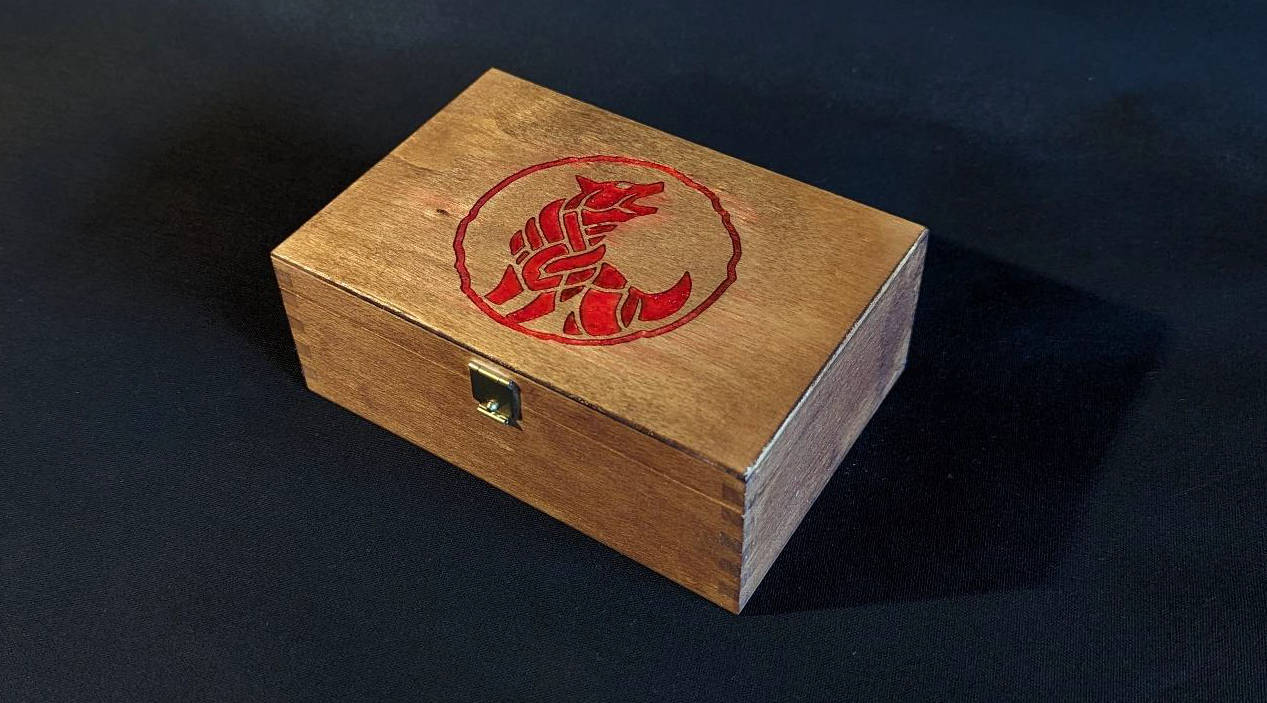
Generate NC Program
To export the selected milling paths as G-code, the included postprocessor "s2c_gcode.lua" can be used. This creates the loadable *.tap file in the project directory for the CNC machine. Therefore, it is advisable to save the project before running the postprocessor.
 © send2cnc.com